New Range Controls in Lightroom and ACR
May 25, 2020
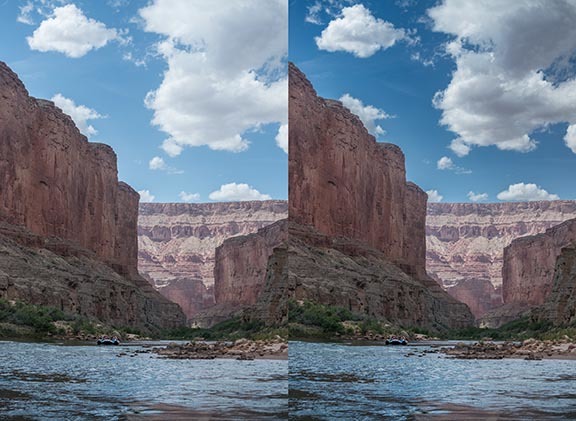
This was made on a rafting trip down the Colorado river, and another raft is visible just upstream. On the left is the image before adjustment. On the right shows after all the adjustments. This is a challenging image because it has "mixed" lighting—sun and shade. In the Before image, the shaded areas are a little dark, but mainly the clouds and sky are quite washed out.
To help the sky and clouds, I’m going to propose a local adjustment. I want to give more separation in the clouds, but don’t want to slop over and darken the tops of the cliffs. Trying to paint in an accurate mask in Raw by hand never works well. A poor selection would show a halo, either with the bottom of the sky lighter, or the top of the cliffs darker (or both). We could wait and do this in Photoshop, and use the Quick Selection tool, which would give a fairly accurate mask. But using these new Range controls here would be easier, and perhaps more accurate!
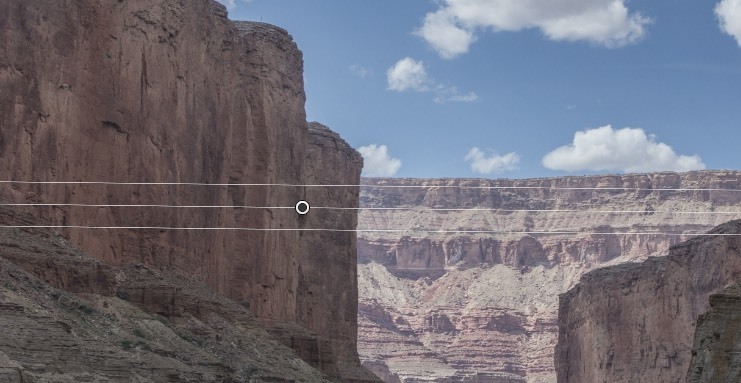
To select this area, I’ll use the Graduated filter. But I’m going to use it in a slightly different way. I need to include all the sky, and a little bit of the cliffs. I really don’t need any gradient.
To do this, start with the cursor below the sky, and drag down just a little way. It should look like the detail below. Holding the shift key down when positioning it will insure it’s completely vertical.
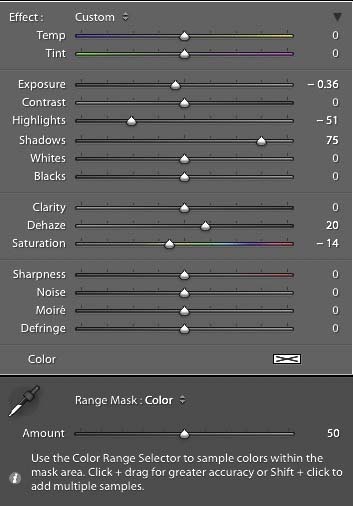
The image below shows the local adjustments I used with this graduated filter: Exposure -.36, Highlights -51, Shadows +75 (this helps lighten the sky back up), Dehaze +20, and Saturation -14 (to counteract the saturation the dehaze just added).
The Dehaze control is kind of like Clarity on steroids! It was designed to remove distant haze in images, and is very powerful! So Dehaze should be used with great care. It gives great highlight separation, but also really darkens dark tones, and can also increase saturation. It often works better as a local adjustment.
After these adjustments, you’ll notice that the top of the cliffs are darker, mainly because they’re still included in the selection! We’ll now fix this.
At the bottom of the image just above you’ll see “Range Mask: Color.” This is one of the new features available when making local adjustments. There is a choice here between Luminance and Color. (In my experience, I find the Color control more valuable). Please select “Color” and when you do, an eyedropper will appear, as you see to the left above. You must now immediately click on this dropper to select the colors you want to be affected by this new adjustment. With the dropper, you can click once on a color, or shift-click to select up to 5 different colors. I find it easier to click in the image with the dropper, hold the mouse down, and draw a box that includes all the colors you want to be affected. As soon as you do this and let up with the mouse, you’ll see that the sandstone cliffs get lighter! They’ve now been excluded from the colors that are affected. So it’s only the blue sky and white clouds that will now change. Amazing!